Checking your blood sugar at home is one of the most useful things you can do to manage diabetes. Each reading is a snapshot that shows how food, activity, stress, sleep and medicine are affecting you right now.
But a reading is only helpful if it is accurate. Small things, like a trace of fruit juice on your finger or a vial of strips left open, can throw a number off. This guide walks you through the process step by step and explains how to get results you and your care team can trust.
Key Takeaways
- Wash and dry your hands before every check; sugar on your skin can cause a falsely high reading.
- Use strips that are in date, stored properly and matched to your meter.
- Many adults aim for 80–130 mg/dL before meals and under 180 mg/dL one to two hours after eating, but your own targets may differ.
- Log your readings with notes about food, activity and medicine so patterns are easier to spot.
- If a reading does not match how you feel, wash your hands and check again.
Explore every guide on the BDDiabetes.com homepage.
Why Home Blood Sugar Checks Matter
Home checks help you see how your body responds to everyday life. They can show whether a meal raised your glucose more than expected, whether a walk brought it down, or whether you are trending low overnight.
Your healthcare team also uses these numbers to adjust your plan. The National Institute of Diabetes and Digestive and Kidney Diseases (NIDDK) notes that regular checks help you make decisions about food, physical activity and medicine. Readings are especially important if you take insulin or medicines that can cause low blood sugar.
How often should you check?
There is no single schedule that fits everyone. Someone using multiple daily insulin injections may check several times a day, while someone managing type 2 diabetes with lifestyle changes may check less often. Ask your doctor or diabetes educator how often and at what times you should test.
What You Need Before You Start
Gather your supplies in one place so checking becomes quick and routine:
- Blood glucose meter with working batteries
- Test strips made for your meter, within their expiration date
- Lancing device and a new lancet
- Logbook or app to record results
- Sharps container or a sturdy, puncture-resistant bottle with a lid for used lancets
- Control solution, if your meter uses it, for occasional accuracy checks
Step-by-Step: How to Check Your Blood Sugar
Always follow the instructions that came with your meter, since models differ. These general steps apply to most fingerstick meters:
- Wash your hands with soap and warm water, then dry them completely.
- Prepare the lancing device. Insert a fresh lancet and set the depth. A lower setting is often enough and may hurt less.
- Insert a test strip into the meter. Most meters turn on automatically.
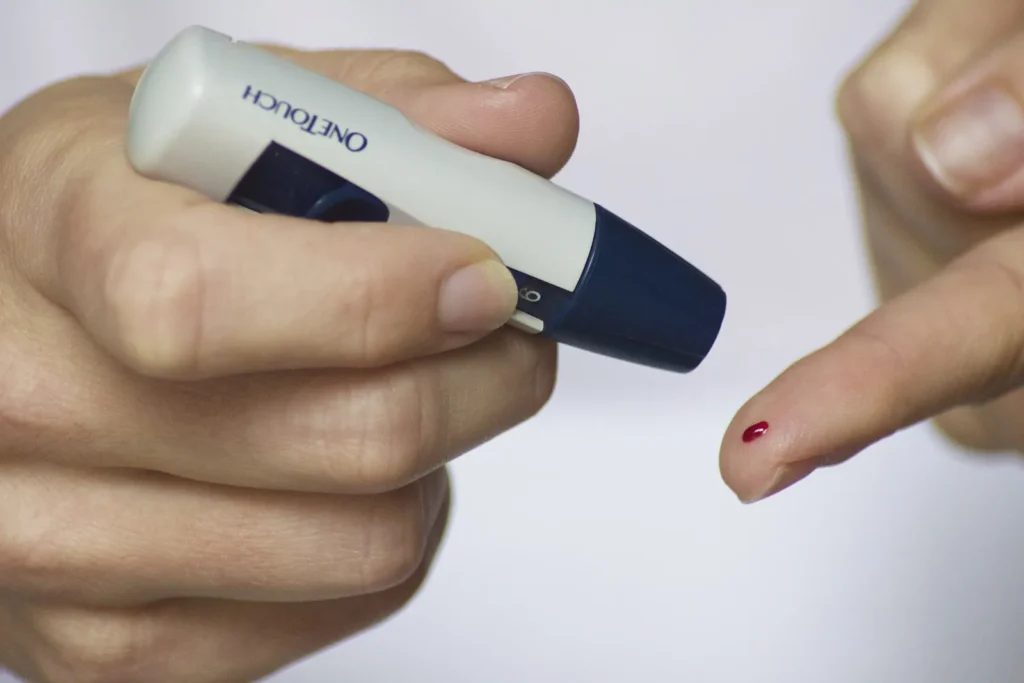
- Prick the side of your fingertip, not the pad. The sides have fewer nerve endings, so it usually stings less.
- Gently squeeze from the base of the finger toward the tip if needed. Avoid hard squeezing, which can dilute the sample with tissue fluid.
- Touch the edge of the strip to the drop of blood and let it fill. Do not smear blood on top of the strip.
- Read and record the result, along with the time and any notes about meals, exercise, illness or medicine.
- Dispose of the lancet safely in your sharps container.
Tip: Rotate the fingers you use and switch between the left and right sides of each fingertip. This gives your skin time to heal and can make checks more comfortable over the long run.
Common Mistakes That Affect Accuracy
Home meters are designed to be close to lab results, though not identical. The U.S. Food and Drug Administration (FDA) sets accuracy standards for meters, but how you use and store your supplies matters just as much.
| Mistake | What can happen | Simple fix |
|---|---|---|
| Food or sugar on your fingers | Falsely high reading | Wash with soap and water before every check |
| Expired or damaged strips | Unreliable results or error codes | Check dates; keep the vial capped |
| Strips exposed to heat, cold or humidity | Readings drift high or low | Store at room temperature, away from bathrooms and hot cars |
| Too little blood on the strip | Error message or wrong result | Get a full drop before touching the strip |
| Squeezing the finger hard | Diluted sample, lower reading | Warm your hands and massage gently |
| Wet hands or alcohol not fully dry | Diluted sample | Dry hands completely before pricking |
Alternate sites and when to avoid them
Some meters allow testing on the forearm or palm. These spots may lag behind fingertip readings when glucose is changing quickly. Use your fingertip if you think you may be low, right after eating or exercising, or when you are ill.
Checking your meter itself
If your meter supports control solution, run a test when you open a new box of strips, if you drop the meter, or if results seem off. You can also bring your meter to a lab appointment and compare a reading taken around the same time as your blood draw.
Understanding Your Numbers
Your targets should come from your healthcare team. As a general guide, the American Diabetes Association (ADA) suggests these ranges for many nonpregnant adults with diabetes:
| Time of check | Common target for many adults |
|---|---|
| Before a meal | 80–130 mg/dL |
| 1–2 hours after the start of a meal | Less than 180 mg/dL |
| Low blood sugar (hypoglycemia) | Below 70 mg/dL |
Targets are often different for children, older adults, people who are pregnant, and people with other health conditions. If you see a reading below 70 mg/dL, follow your hypoglycemia plan. Our guide to low blood sugar and the Rule of 15 explains how to treat it.
Day-to-day readings also connect to your long-term picture. Your A1C test reflects your average glucose over about three months, while home checks show the ups and downs in between.
Making Your Readings Work for You
A log full of numbers becomes powerful when you look for patterns. At bddiabetes.com we encourage readers to bring their logs or app reports to every appointment.
- Note the context. Write down what you ate, how active you were and whether you felt stressed or unwell.
- Look for repeats. One high reading is a data point; the same high reading every morning is a pattern worth discussing.
- Pair checks with meals. Testing before and two hours after a meal can show how certain foods affect you. Tools like the diabetes plate method can help you compare meals.
- Do not change medicine on your own. Share patterns with your care team and let them adjust doses.
What about continuous glucose monitors?
A continuous glucose monitor (CGM) uses a small sensor worn on the skin to measure glucose every few minutes. Many people find CGMs helpful, but fingerstick checks are still useful, for example to confirm a reading that does not match your symptoms. Ask your provider whether a CGM is right for you.
When to Call Your Healthcare Team
Contact your doctor or diabetes educator if you notice:
- Readings that stay above your target range for several days
- Frequent readings below 70 mg/dL, or any low you could not treat yourself
- Very high readings along with nausea, vomiting, stomach pain or trouble breathing; seek urgent care
- Results that seem inaccurate even after a control solution test
For more practical guides on numbers and monitoring, browse our Blood Sugar section.
Frequently Asked Questions
Should I wipe away the first drop of blood?
If your hands are clean and dry, most people can use the first drop. If you could not wash your hands, follow your meter maker’s guidance; wiping away the first drop may help, but washing is the better option.
Can I use alcohol wipes instead of washing?
Soap and water are preferred. If you use an alcohol wipe, let the skin dry completely before pricking, because leftover alcohol can affect the result.
Why do two meters give different numbers?
Each meter has an allowed margin of error, so small differences are normal. Large differences may point to a strip, storage or technique problem.
This article is for educational purposes only and is not a substitute for professional medical advice. Always talk with your doctor, diabetes educator or pharmacist before changing your treatment.