
Insulin pens have made daily insulin much simpler for millions of people. Compared with a vial and syringe, a pen is compact, easy to carry and lets you dial your dose instead of drawing it up. Still, a few small details make a big difference in getting the full dose every time.
This step-by-step guide covers the basics that apply to most pens. Every brand works a little differently, so always follow the instructions that came with your pen and the training from your diabetes care team.
Key Takeaways
- Use a new pen needle for every injection and never share a pen, even if you change the needle.
- Check the insulin’s name, expiration date and appearance before every dose.
- Do a safety test (priming) before each injection, as your pen’s instructions direct.
- After pressing the button, hold the needle in the skin for the time your pen’s instructions say before removing it.
- Store unopened pens in the refrigerator and in-use pens as the label directs, and dispose of needles in a sharps container.
Know the Parts of Your Pen
Before you start, it helps to know what you are looking at. Most pens share the same basic parts:
| Part | What it does |
|---|---|
| Pen cap | Protects the insulin cartridge; keep it on between doses |
| Insulin reservoir or cartridge | Holds the insulin; you can see it through a window |
| Rubber seal | Where the pen needle attaches |
| Dose window | Shows how many units you have dialed |
| Dose knob | Turns to select your dose |
| Injection button | Pressed to deliver the insulin |
| Pen needle | Screws or snaps on; has an outer cap, an inner cap and a paper tab |
Some pens are prefilled and thrown away when empty. Others are reusable and take replaceable cartridges.
What You Need Before You Start
- Your insulin pen
- A new pen needle
- Alcohol swab
- A sharps container or a heavy-duty plastic household container
- Your dose instructions from your healthcare provider
Step-by-Step: How to Use an Insulin Pen
Step 1: Wash your hands and check your insulin
Wash your hands with soap and water. Check the label to make sure it is the right insulin, especially if you use more than one type. Look at the expiration date and note when you first started using the pen.
Look at the insulin itself. Clear insulins should be clear and colorless. Cloudy insulins, such as NPH or some premixed insulins, need to be gently mixed by rolling the pen between your palms and tipping it up and down as directed until evenly cloudy. Do not shake it hard. If clear insulin looks cloudy or has clumps or crystals, do not use it.
Step 2: Attach a new needle
Wipe the rubber seal with an alcohol swab. Peel the paper tab off a new pen needle and screw or push it straight onto the pen. Remove the outer cap and keep it for later. Then remove the inner cap and throw it away.
Step 3: Do a safety test (prime the pen)
Priming removes air bubbles and makes sure insulin flows through the needle. For many pens, this means dialing 2 units, holding the pen with the needle pointing up, tapping the reservoir gently so bubbles rise and pressing the button until a drop of insulin appears at the tip. Your pen’s instructions will tell you the exact amount. If no drop appears, repeat as your instructions direct or change the needle.
Step 4: Dial your dose
Turn the dose knob to the number of units your provider prescribed. Check the dose window to confirm. If you dial too far, most pens let you turn back without losing insulin.
Step 5: Choose and prepare your injection site
Common sites include the abdomen (at least 2 inches away from the belly button), the front and outer thighs, the back of the upper arms and the upper buttocks. Make sure the skin is clean. If you use alcohol, let it dry first so the injection stings less. Using a different spot each time helps prevent lumps; see our guide to injection site rotation.
Step 6: Inject the insulin
Hold the pen like you would grip a fist, with your thumb free for the button. Insert the needle straight into the skin at a 90-degree angle, unless your provider has taught you otherwise. With today’s short needles, most adults do not need to pinch the skin. Our pen needle length guide explains why.
Press the injection button all the way down until the dose window returns to zero.
Step 7: Hold, then remove
Keep the button pressed and leave the needle in your skin for the time your pen’s instructions specify, often about 6 to 10 seconds. This helps make sure the full dose is delivered and reduces leakage. Then pull the needle straight out.
Step 8: Remove and dispose of the needle
Carefully replace the outer needle cap, unscrew the needle and drop it into your sharps container. Put the pen cap back on. Removing the needle after each dose keeps air and contaminants out of the pen and prevents insulin from leaking.
Tip: If you see a drop of insulin on your skin after you inject, try holding the needle in a little longer next time. If leakage keeps happening, mention it to your diabetes educator.
Common Mistakes to Avoid
- Reusing needles. Needles dull quickly, which can make injections more painful and may contribute to skin changes.
- Skipping the safety test. An air bubble or blocked needle can mean you get less insulin than you think.
- Removing the needle too quickly. This can cause part of the dose to leak out.
- Injecting into the same spot. Repeated use of one area can cause fatty lumps that affect absorption.
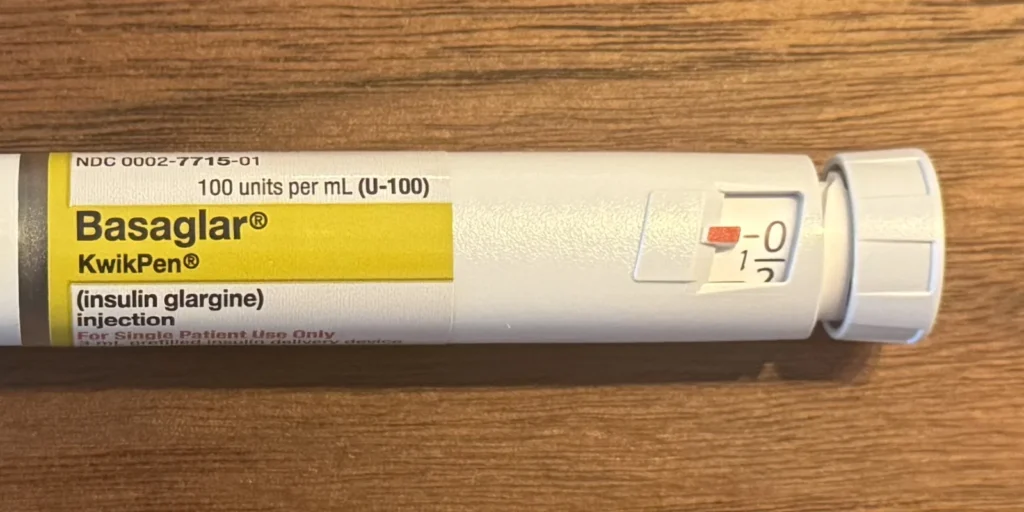
- Sharing pens. The FDA requires insulin pens to be labeled for single-patient use only. Pens must never be shared, even with a new needle, because blood can enter the cartridge and spread infections.
How to Store Insulin Pens
Unopened pens are usually kept in the refrigerator, between 36°F and 46°F (2°C to 8°C), until the expiration date. Never freeze insulin, and do not use a pen that has been frozen. The NIDDK offers more background on insulin types and how they are taken.
Once you start using a pen, many products can be kept at room temperature for a set number of days, often 28 days but sometimes longer or shorter. Check your product’s label. Keep pens away from direct heat and sunlight, such as a hot car or a sunny windowsill.
Safe Needle Disposal
Used needles should go into an FDA-cleared sharps container or, if one is not available, a sturdy plastic household container with a tight lid, such as a laundry detergent bottle. Disposal rules vary by community, so check local guidelines. The FDA’s sharps disposal guidance is a helpful starting point.
At bddiabetes.com we know that the first few injections can feel intimidating. Most people find that confidence comes quickly with practice and support. You can find more guides in our Insulin Therapy section, and for help spotting and treating lows, see our guide to the hypoglycemia rule of 15.
Frequently Asked Questions
Does an insulin pen hurt?
Most people feel very little. Using a new, short, thin needle each time, letting alcohol dry before injecting and injecting room-temperature insulin can all make injections more comfortable.
What if I forget whether I took my dose?
Do not take another dose “just in case,” because that can cause low blood sugar. Check your blood sugar and call your healthcare provider for advice. Some pens and pen caps record dose times, which can help.
Can I inject through clothing?
It is not recommended. Injecting through clothes makes it hard to see the site, can dull the needle and may increase the risk of infection.
How do I know when my pen is empty?
Check the insulin left in the reservoir and the dose knob. Most pens will not let you dial more units than remain. If you need more than what is left, follow your provider’s guidance on splitting the dose or starting a new pen.
This article is for educational purposes only and is not a substitute for professional medical advice. Always talk with your doctor, diabetes educator or pharmacist before changing your treatment.